Sunday, 25 January 2015

No churn Cinnamon Ice cream made with dairy free Condensed Milk

This delicious creamy cinnamon ice cream is soooooooo yummy and takes 5 minutes to make. No Ice cream machine needed and only 6 hours in the freezer and it's ready to be enjoyed :)
Try this out folks. 
I will be making the full dairy free version soon so watch this space :)

Ingredients :

1 300 ml tub of whipping cream
1 tsp cinnamon powder

Method and preparation:

Pour the whipping cream into a large bowl and whisk it until just thickened .
Now add in the Condensed milk and Cinnamon and stir gently.

Pour into a freezer proof container and freeze for 6 hours .

Enjoy on it's own or with a slice of warm Apple Pie <3 :) Yum.

Enjoy peeps :)


Friday, 23 January 2015

Dairy free /Vegan sweetened condensed milk

This recipe for sweetened condensed milk is fantastic for those of you who are vegan or lactose intolerant , actually it's fantastic for anyone and tastes great.
The consistency is slightly different to the dairy version but never the less it tastes yummy and works in the exact same way . 
This also smells delicious whilst cooking it yum.
I made this because I'm going to make dairy free ice cream and it's perfect :)
I hope you give this a go peeps it's awesome.

Ingredients :
1 can of coconut milk (I used two small ones as I was trying it out.)


And 1 cup of granulated sugar.

That's it.

Method and preparation:

Add the sugar and coconut milk ( everything from the can) Into a large pan.


Mix well util sugar starts to dissolve.

Bring the mixture to a rolling boil  .


Once it starts to boil turn the heat down and let it simmer for 20 - 25 minutes stirring frequently so it doesn't stick and burn.

The colour will change slightly at this point.


The mixture will also start to thicken now.
After the 25 minutes are up remove the pan from the heat and let it cool before pouring it into a bowl or jar.


At this point feel free to add a little vanilla extract if you wish. I didn't add any as I thought it tasted amazing as it is.


Here's the end product :) Doesn't it look amazing :)

Put it in a jar or container and refrigerate until ready to use. 
This should last up to 7 days in the fridge.

Enjoy :)


Thanks for looking.

Note: 
If your condensed milk solidifies after a few hours in the fridge, DON'T throw it away just heat it in the microwave for a minute just before using in a recipe,it'll be just fine :)

Tuesday, 20 January 2015

Cinnamon Swirl Bread

If you love anything Cinnamonny like I do then this is the recipe for you :) This delicious quick and easy no yeast bread is amazing and tastes just like cinnamon rolls that you buy in bakeries but it's more cakey then bread like.
Enjoy this delicious bread with your fave hot drink and I promise you ,you will love it. I have to say it's my favourite bake so far.


Ingredients:

2 cups of plain flour
1 cup of sugar
1 tsp baking powder
1/2 tsp salt
1 medium egg
1/4 cup oil ( I used sunflower)
1 tsp vanilla extract
1 cup of sugar mixed with 2 tbs of ground cinnamon
1 and 1/2 cups of milk ( use one cup first and add more if needed )
butter for greasing loaf tin

Method and preparation:

Preheat your oven to 180 or 350

prepare your loaf tin by greasing it around the sides and 'flouring' with a little of the sugar and cinnamon mix until coated well.

In a large bowl sift in the flour and add the sugar ( plain sugar not the mixed one), baking powder and salt and give it a quick stir.

in a separate bowl whisk the egg and add the oil, and vanilla extract and milk and whisk it up.

Add the wet ingredients to the dry and stir it gently only to moisten the flour. You don't want a smooth cake batter so don't over mix. ( lumps are good) Just a couple of stirs.

If you feel the mixture is too dry , this is where the half cup of milk comes in. Add a few splashes at at a time until just moistened.

Now add half the mixture into your loaf tin and and half of the sugar and cinnamon mix on top of that layer.

Use a butter knife to make swirly patterns on the batter and then add the other half of the batter on top and do the same with the mixed sugar and swirl the batter again.
Add some of the mixed sugar on top for a crispy top if you wish.

Bake in the oven for 45- 50 minutes depending on your oven. Mine took 50 minutes so keep and eye on your bread and test it for 'doneness' by inserting a skewer or tooth pick and if it comes out clean it's ready :)

Make sure you let the bread cool completely before turning it out onto a plate because this bread WILL crumble and break.

Enjoy ;)
I hope you try this recipe, it's too good not to.


The whole house will smell sooo good while its baking :)


Monday, 19 January 2015

Cinnamon Syrup

If you're a big fan of flavoured coffee like me and also a lover of cinnamon then this is the recipe for you.
This cinnamon syrup is so easy to make and very versatile too. And best of all it requires only 4 ingredients :)

Please give this a go peeps you won't regret it. 
Flavour hot drinks of your choice with this syrup, pour it over ice cream, pancakes, waffles, fruit or whatever you like ;). 


Ingredients:
1 cup of sugar (I used raw cane sugar)
1 Table spoon cinnamon powder
1 cup of water
1 teaspoon vanilla extract ( proper vanilla not essence)

Method and preparation:

Put all the ingredients apart from the vanilla into a deep pan ( it bubbles a lot)

Stir the mixture until the sugar dissolves and then bring the mixture to a rolling boil and keep stirring.
Once you reach the boiling point, turn the heat down to low-medium and continue to stir for 5 minutes only.
After the five minutes are up, remove the pan from the heat and stir in the vanilla extract.

at this point the syrup may seem a little runny but don't worry as it thickens as it cools and even more so in the fridge.

Do not over cook this mixture as you don't want to crystallize the sugar.(it will go hard like candy and your efforts will be wasted).

pour into a clean bottle or jar of choice , let it cool and refrigerate.
 
This syrup will last for a month in the fridge :)

I hope you enjoy this recipe :)

Thanks for looking.


Notes: the mixture will bubble vigorously even when you lower the heat, please be careful not to burn yourself as the sugar gets extremely hot.

Friday, 12 December 2014

Sayj's Festive chutney

I love cheese and crackers and the best chutney I've eaten is one we got last year from The English Provender Co. it was absolutely delicious.


 I haven't seen it in any supermarkets near me so this year I decided to make my own with a few twists I hope you try this recipe, I'm so proud of what I've created :) 

Ingredients :

3 medium sized Red Onions
1 tablespoon of Olive oil
1 tablespoon of butter ( I used salted)
1 cup of packed brown sugar ( you can use granulated )
1/2 a cup of Fruity red wine
3 tablespoons of malt vinegar
1 teaspoon ground cinnamon
1 teaspoon ground ginger
1 teaspoon cayenne pepper
1 teaspoon black pepper ( ground)
1/2 teaspoon salt
Juice of two Clementines
2 Bay leaves.

Method and preparation:

Dice or slice the onions .


Add the butter and olive oil to a large pan.


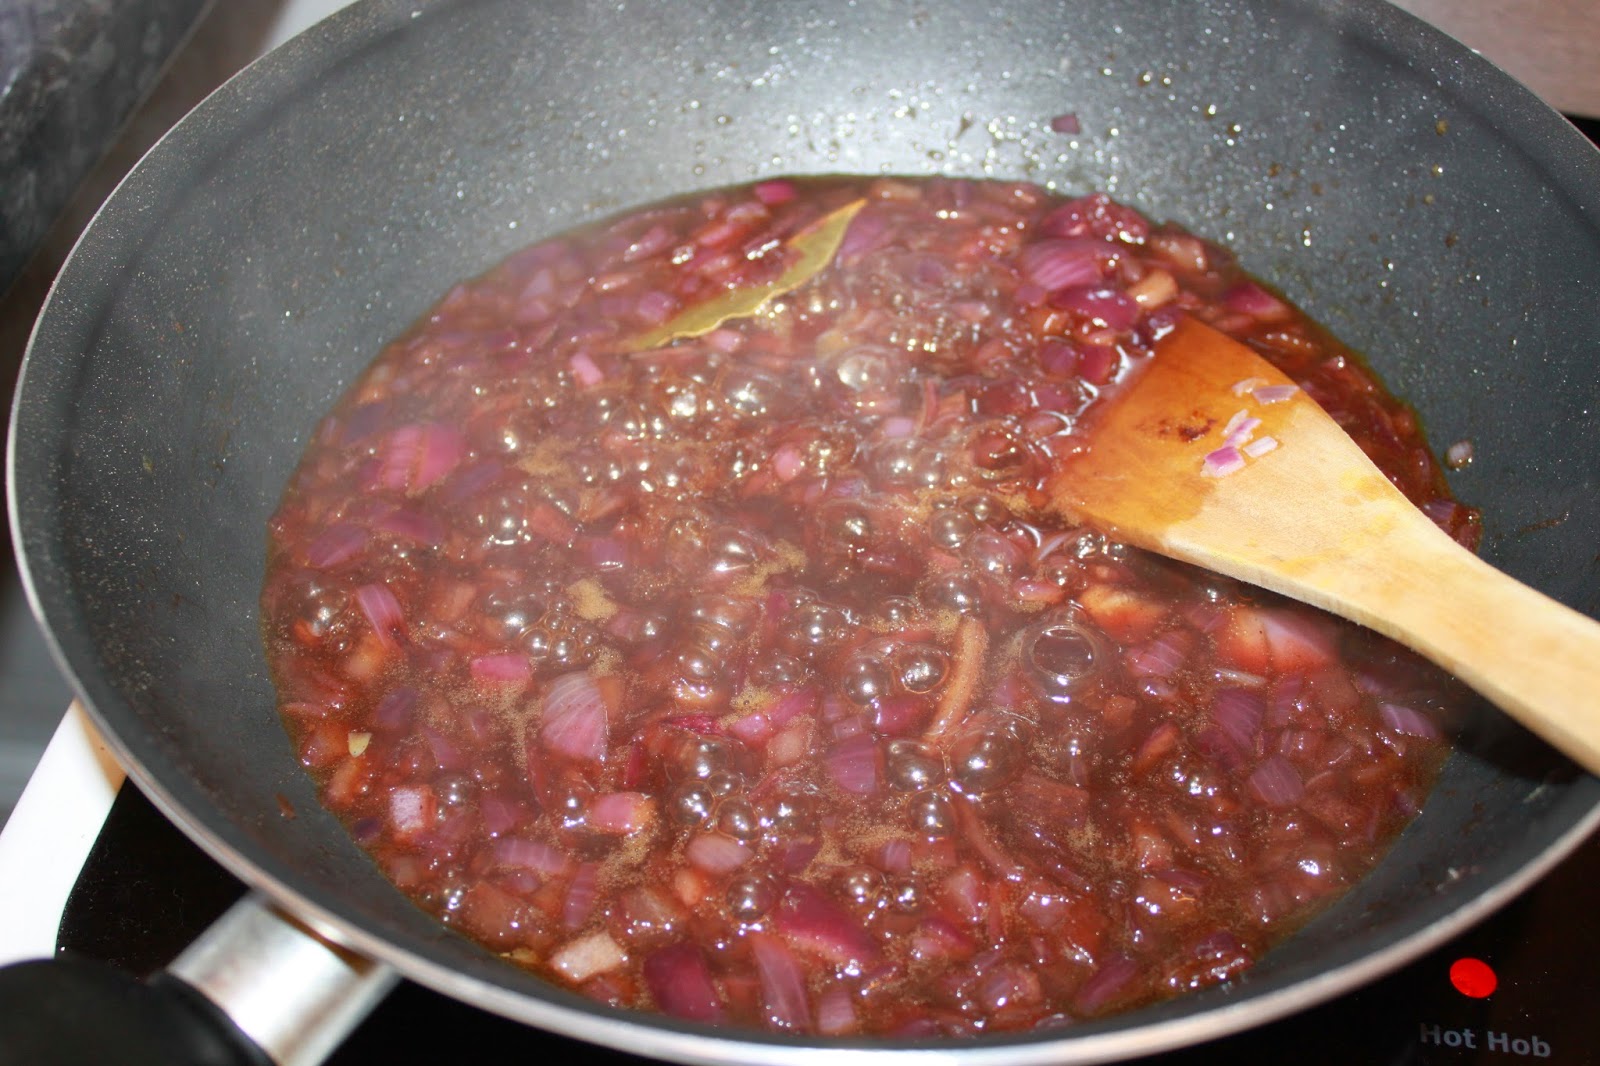
With the butter has nearly melted, add in the onions and Bay leaves.


Cook the onions on a medium heat until they become soft and translucent . This should take 20 minutes.


Now add the spices, sugar, juice and wine.


Mix all the ingredients through and bring it to a boil.


Now turn down the heat to medium and simmer for 30 -40 minutes until you get a lovely thick gooey consistency.


Do not be tempted to over cook this chutney as like jam if over cooked it may crystallize .

pour the chutney into a sterilized jar and let it cool before refrigerating.


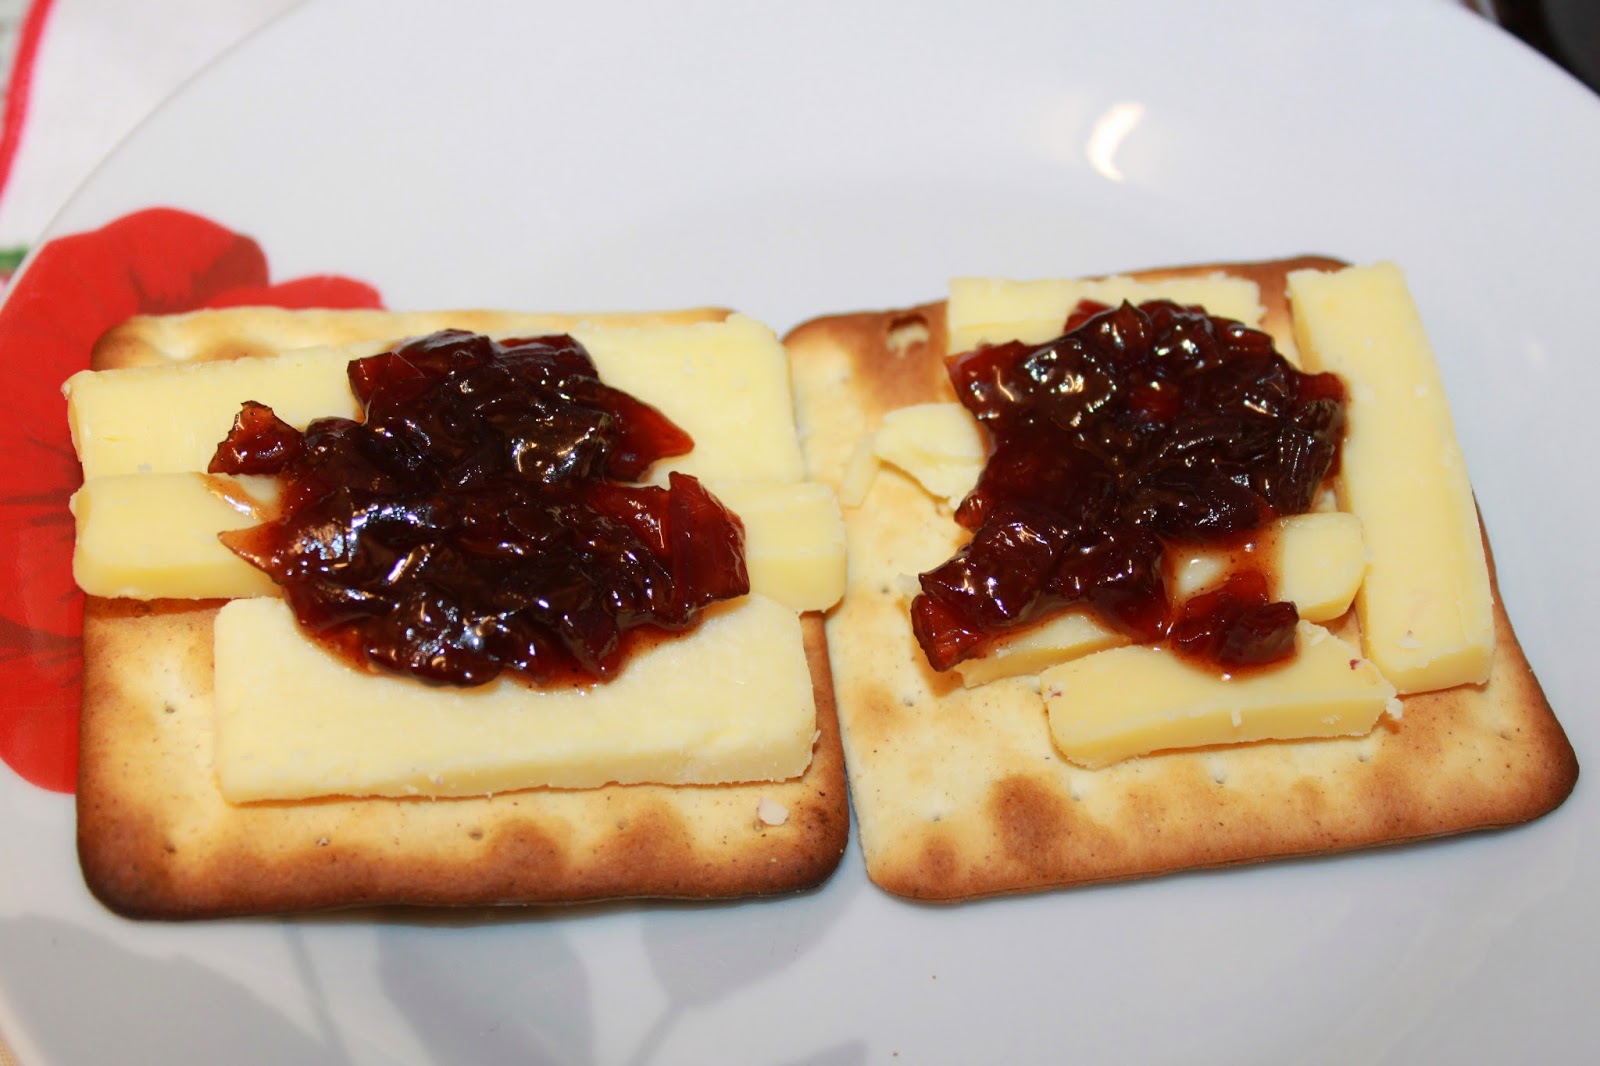
Enjoy this chutney with cheese and crackers, or in a sandwich or anything at all :)

Bon Appetite ;)


If anyone tries this recipe I'd love to know what you think :)


Notes :

If you find that your chutney is setting a little too hard add a few drops of boiling water to it and stir it in until you're happy with it.

This chutney will last in your fridge for up to 6 months and tastes better as it matures.
Enjoy.

Wednesday, 10 December 2014

Cherry Ripe Bites

Cherry Ripe bars are chocolate bars made with a coconut and cherry filling inside. Unfortunately although made by Cadburys it's not available in the UK.
They looked so delicious in the pics that I've seen of them that I had to see if I could make a homemade version of them.

If you're a lover of coconut, chocolate and glace cherries, then this is the recipe for you. It's quick, easy and delicious so please give it a try :)

Ingredients:

Half a cup of condensed milk 
2 cups of desiccated coconut
small tub of Glace Cherries
Chocolate of your choice ( I used a large bag of buttons and a bar of Bournville ( dark chocolate)

Method and preparation:

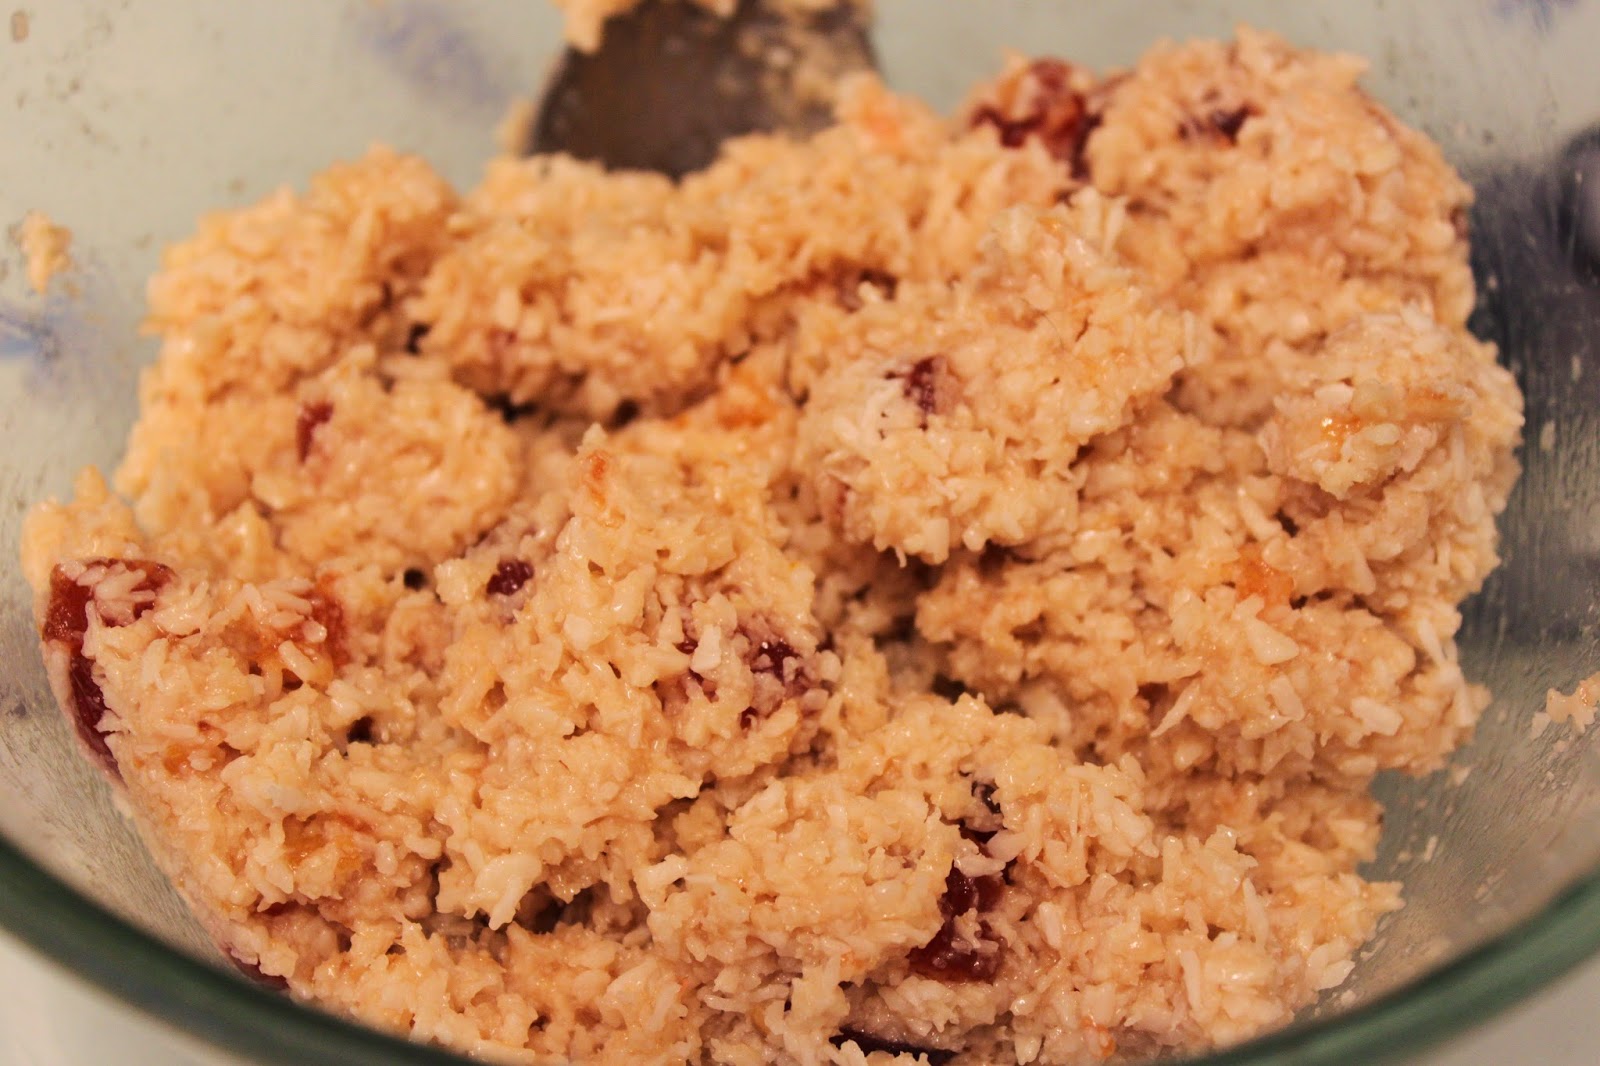
Add most of the cherries ( I used a cup full ) and leave a few to chop later ,Coconut and the condensed milk into a blender. Or you can use a stick blender like I have.


Blend until it's well incorporated (only a a couple of pulses)

Empty the contents into a bowl.


Now chop up the rest of the cherries and add to the bowl.


Mix well to ensure each of the balls gets some chopped cherries into them .


Now line a tray or plate with either foil or grease proof paper ( I used foil as I ran out of grease proof)

Roll the mixture into small balls and place them on the lined plate.


Quick tip :

keep a bowl with a little water on the counter while rolling the mixture and dip your palms in it and shake off the excess and start to roll, this makes the rolling easier as the condensed milk can make it a little messy to roll the balls. You can do this every two or three balls making sure you don't have too much water on your palms.

Place your plate into the fridge for about 15 to 20 minutes. Or in the freezer for 10 minutes to help them set.

Once the coconut bites are set, remove them from the fridge and start to prepare the melted chocolate.

Place the chocolate in a glass heat proof bowl and either slowly microwave it until it melts or like me put the bowl in another pan of simmering water and let it melt gently.


Once the chocolate has melted let it cool for a minute.


Now carefully dip the coconut bites into the chocolate making sure to coat them well. (mine are quite rustic but taste amazing) place them back on the lined plate and put them back into the fridge /freezer to set.

Lastly... Enjoy :)


These treats can be kept frozen and enjoyed cold .

 
Happy eating folk ;).

Saturday, 6 December 2014

Sweetened Condensed Milk


I don't know about anyone else but I never have condensed milk handy in the baking cupboard when it comes to needing it for a recipe. I secretly hoped it was easy to make so I didn't have to go out and buy it. I searched online and most of the recipes called for it to be cooked for 2 hours on the lowest heat and I certainly don't have the patience for that. Thank goodness I found a couple of recipes which only needed 20 minutes in total to cook and just a few ingredients to use too which you will definitely have at hand  :) 

This Recipe is absolutely yummy and I know for a fact that I will NEVER by the shop bought stuff again with the ten ingredients in it that no one knows how to pronounce let alone know what they are used for (yuk ) Why didn't I know of this before huh?

Please give this recipe a go folks, I promise you will love it and like me won't go back to shop bought unless you really don't like it ;)

Ingredients:

1 and a 1/2 cups of milk (I used semi skimmed)
1 cup of sugar ( you can use any type)
pinch of baking soda
1 teaspoon of vanilla extract (optional but I used it)


Method and Preparation:

Have your ingredients ready to use.


The pic shows one cup of milk but I actually used one and a half cups :)


Add the milk and the sugar into a large pan and set the heat on medium.


Stir the sugar into the milk until its all dissolved nicely. You will already see the colour start to change at this point.


Now turn the heat up and bring the milk to a rolling boil and quickly stir in the baking powder.


The baking powder will activate and make the milk fizz and foam but don't panic , this is normal.


Turn the heat down to medium again and set your timer for 20 minutes continuing to stir.


The foam is slowly starting to disappear.


You will see the mixture thickening up as the sugar starts to caramelize.

Once the time is up, remove the pan of the heat and stir in the vanilla extract (if using)


Don't be alarmed with the foam it will disappear when mixed and cooled.


This recipe made just shy of 1 cup so go ahead and double or triple the recipe if you need to but make sure you use the correct ratio of milk and sugar. 


The consistency may not look thick at this moment but trust me folks it thickens as it cools so be patient :)

Pour it into a container of your choice and refrigerate until ready to use :)


You will see a thin film of foam at the top of the container after it's been refrigerated but this mixes in and doesn't affect the taste.
You'll also see how much it thickened over night.


Isn't that just gorgeous ! Just wait til you try it... It's amazing :)

Notes :

Homemade condensed milk will always be thicker than the shop bought canned stuff. If you want to thin it to your liking just add add a little boiled water to it until you get your desired consistency.

Do not take your eyes of the mixture whilst cooking it, burnt milk will result in a horrible end product and all your trouble will go to waste so keep an eye on the stove. 

Enjoy peeps, I hope you try this and like it.